Difference between revisions of "Steering Quadrant, conduit and cable replacement"
(Created page with "My original Quadrant had been overtightened on the rudder shaft resulting in a crack at the left hand bolt location. It was repaired by welding and this worked well but when I...") |
|||
| Line 3: | Line 3: | ||
[[File:Old-quadrant.jpg|350px|center|Old Quadrant with Crack]] | [[File:Old-quadrant.jpg|350px|center|Old Quadrant with Crack]] | ||
| + | The new quadrant was slightly different to the old one in that the quadrant arms did not come centrally off the shaft but instead came off the shaft slightly lower down than the old one. Since the pulley frame could not be fitted lower down it was decided to fit the quadrant upside down necessitating the pulley frame to be raised on a pad by about half an inch. | ||
| − | The new quadrant had to be machined to match the shaft diameter and the keyway size | + | The new quadrant also had to be machined to match the shaft diameter and the keyway size. |
| − | |||
| − | |||
[[File:Quadrant.jpg|350px|center|New Quadrant]] | [[File:Quadrant.jpg|350px|center|New Quadrant]] | ||
| Line 19: | Line 18: | ||
[[File:New-conduit-termination.jpg|350px|center|open up holes to suit new terminations]] | [[File:New-conduit-termination.jpg|350px|center|open up holes to suit new terminations]] | ||
| − | + | The new conduit was fed along same path as the old one. This proved to be quite easy. Note mark showing which cable turns boat to starboard. This corresponded to the red marker tape at the other end. | |
[[File:New-conduit-fed-through.jpg|350px|center|New conduit in place]] | [[File:New-conduit-fed-through.jpg|350px|center|New conduit in place]] | ||
| Line 27: | Line 26: | ||
[[File:Top-view.jpg|350px|center|steering chain]] | [[File:Top-view.jpg|350px|center|steering chain]] | ||
| − | Feed new cable into conduit before bolting up the plate. Note the conduit is marked at both ends to make sure rudder turns | + | Feed new cable into conduit before bolting up the plate using a little ptfe friendly grease to lubricate the cable. Note the conduit is marked at both ends to make sure rudder turns in the correct sense. (NB there is effectively a cross over of the cables between wheel and quadrant). |
[[File:New-cable-fed-into-conduit.jpg|350px|center|feed new cable in before securing plate]] | [[File:New-cable-fed-into-conduit.jpg|350px|center|feed new cable in before securing plate]] | ||
| − | It is most important to only adjust cable nuts FINGER TIGHT. If adjusted too tight steering will be stiff. | + | It is most important to only adjust the cable nuts FINGER TIGHT. If adjusted too tight steering will be stiff. |
[[File:Adust-cable-finger-tight-on.jpg|350px|center|adjust cable finger tight only]] | [[File:Adust-cable-finger-tight-on.jpg|350px|center|adjust cable finger tight only]] | ||
Revision as of 09:06, 30 March 2018
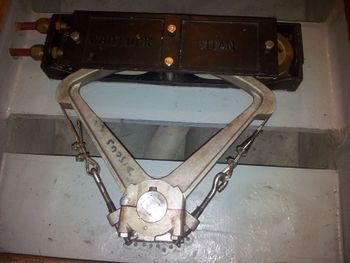
My original Quadrant had been overtightened on the rudder shaft resulting in a crack at the left hand bolt location. It was repaired by welding and this worked well but when I replaced the steering cables and conduit I decided to fit a new quadrant at the same time.
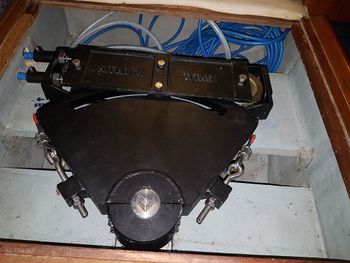
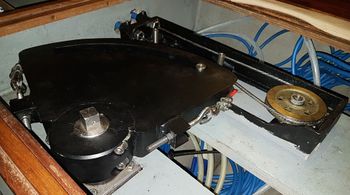
The new quadrant was slightly different to the old one in that the quadrant arms did not come centrally off the shaft but instead came off the shaft slightly lower down than the old one. Since the pulley frame could not be fitted lower down it was decided to fit the quadrant upside down necessitating the pulley frame to be raised on a pad by about half an inch.
The new quadrant also had to be machined to match the shaft diameter and the keyway size.
Changing Steering Conduit
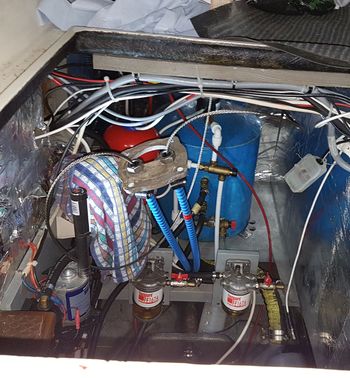
The old cable and conduit was removed and measured to enable a new set to be ordered. There is a plate which is bolted to the underside of the steering console and this had to be dropped to allow the conduit fixings to be removed.
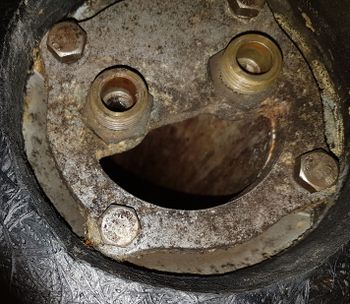
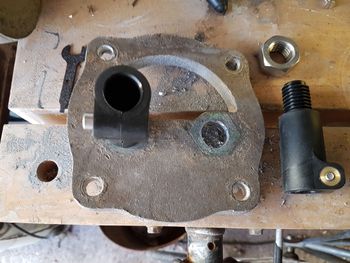
The new conduit set came with new terminations that necessitated the holes in the pulley frame and the steering console mounting plate to be opened up slightly.
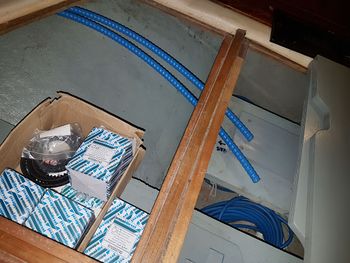
The new conduit was fed along same path as the old one. This proved to be quite easy. Note mark showing which cable turns boat to starboard. This corresponded to the red marker tape at the other end.
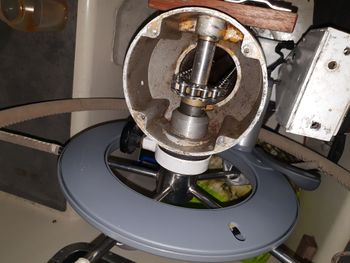
View of steering chain on sprocket
Feed new cable into conduit before bolting up the plate using a little ptfe friendly grease to lubricate the cable. Note the conduit is marked at both ends to make sure rudder turns in the correct sense. (NB there is effectively a cross over of the cables between wheel and quadrant).
It is most important to only adjust the cable nuts FINGER TIGHT. If adjusted too tight steering will be stiff.
Then add second nut to lock setting. Note the pulley frame is mounted on a pad to lift it to the right level so the cables align with the grooves in the quadrant.
Resources
Quadrant, steering cable, conduit, ptfe friendly grease and chain links supplied by Whitlock South winch servicing here: Whitlock South web site
References
How to replace steering conduit and cables. Detailed paper available on request from Cliff Mogridge at Whitlock South Winch servicing
