Difference between revisions of "Upgrading to an Electric Windlass"
Novocastrian (talk | contribs) |
Novocastrian (talk | contribs) |
||
| Line 1: | Line 1: | ||
Many Westerly Owners, especially with the smaller models, stick with the traditional way of bringing in the anchor and chain, either by manually hauling in or maybe via a manual windlass. Westerly Yachts are all ageing these days - and so are their owners. This page explains how to install a modern electric windlass on a Centaur, but the same guidelines apply to most models. | Many Westerly Owners, especially with the smaller models, stick with the traditional way of bringing in the anchor and chain, either by manually hauling in or maybe via a manual windlass. Westerly Yachts are all ageing these days - and so are their owners. This page explains how to install a modern electric windlass on a Centaur, but the same guidelines apply to most models. | ||
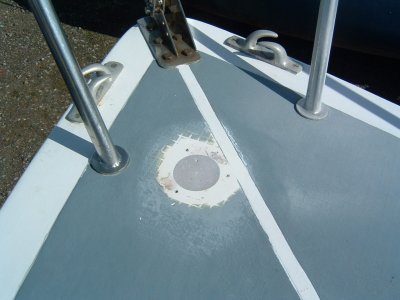
| − | + | The first step is to remove the original chainpipe and seal the hole. David's Isopon P40 is a good bridging compound as it contains a mix of resin and glassfibres for strength. | |
[[File:Windlass_Chainpipe.jpg]] | [[File:Windlass_Chainpipe.jpg]] | ||
| + | |||
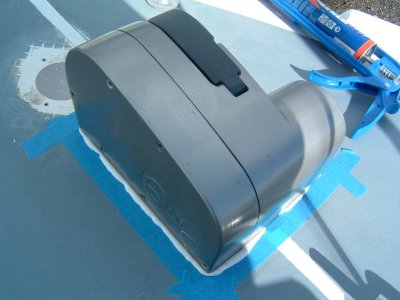
| + | The next job is to locate the windlass (in this case a Quick Genius 600 electric windlass) and cut a square where the chain will fall through to the chain locker. Be careful when identifying where you want the windlass to be as there is a bulkhead between chain locker and forecabin and you want the chain to fall into the rearmost part of the locker but obviously not into the V berth ! A pilot hole will help verify you have chosen correctly. | ||
| + | |||
| + | The windlass is secured in place with stainless studs and you need to bed it using Sikaflex or similar seating compound. | ||
| + | |||
| + | [[File:Windlass_Placement.jpg]] | ||
Revision as of 20:42, 1 December 2011
Many Westerly Owners, especially with the smaller models, stick with the traditional way of bringing in the anchor and chain, either by manually hauling in or maybe via a manual windlass. Westerly Yachts are all ageing these days - and so are their owners. This page explains how to install a modern electric windlass on a Centaur, but the same guidelines apply to most models.
The first step is to remove the original chainpipe and seal the hole. David's Isopon P40 is a good bridging compound as it contains a mix of resin and glassfibres for strength.
The next job is to locate the windlass (in this case a Quick Genius 600 electric windlass) and cut a square where the chain will fall through to the chain locker. Be careful when identifying where you want the windlass to be as there is a bulkhead between chain locker and forecabin and you want the chain to fall into the rearmost part of the locker but obviously not into the V berth ! A pilot hole will help verify you have chosen correctly.
The windlass is secured in place with stainless studs and you need to bed it using Sikaflex or similar seating compound.

